Isn't this the cutest! I love it!
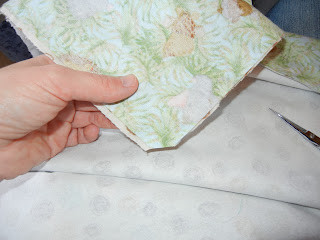
First, pick out your favorite fabric for the outside. I love the bright colors in this fabric.
Cut a 6"x7" rectangle.
Crease down the center, long way, simply by folding it and pressing the crease w/fingers.
Pin down the center.
Now you will sew a straight seam down each side of the pin, having the foot alongside the pin.
Do Not backstitch!!
Make sure to leave about 5-6 inches of thread off the ends for pulling the gathers.
Take one of the strings from the first seam and pull gently to create gathers.
Do this on both ends of both stitches, top and bottom.
This is what the gathers look like.
Now you need to press the gathers in place.
Do not iron!
*Pressing is setting the iron down and lifting it back up. Ironing is moving the hot iron all over the fabric.
Another weird placement of picture that I couldn't figure out how to rotate. Anyway...
Trim up the sides of the gathered fabric to make them even, which makes it much easier to work with.
When I trimmed my edges the size measured 7"x5 1/2"
You are going to take your contrasting fabric for the band, and cut it 2"x7". An inch longer on each side.
Fold the band in half, length wise, right sides together. Sew a seam down the side, being sure to back stitch at beginning and end.
Now turn the band, right sides out. (skip over next two pics for now and go to the white band pic)
Your clutch measures 5 3/4"x...
6"
Iron the band flat, with the seam in the middle.
Pin the band over the gathering seams and pin in place.
Stitch close to the edge on the white band, top and bottom. If, by chance, some of the gathering seams show, just snip them. Those don't matter right now as the band stitches are now holding the gathers in place. It probably won't happen, but it did for me on one of my clutches and I just snipped the showing stitches and didn't have a problem.
Trim the white band even with the clutch.
Now go back up to those two pictures we skipped over. Trust me, I have had quite the deal with my posting today and have nearly thrown my computer out the window. Thanks for you patience!
Find a coordinating zipper. I chose a red one.
Cut it down to 1" shorter than the width of your clutch front. So, this one was cut down to 4 3/4" (the width of clutch is 5 3/4")
Here are all your pieces now. Let's go over the measurements of each piece:
Zipper - 4 3/4"
Gathered front and flat back - 5 3/4"x6"
Two flat inside pieces (white) - 5 3/4"x6"
Two small white pieces for zipper ends - 2x2"
For the 2x2" zipper ends, fold the ends toward the middle and iron down.
Put the zipper ends inside the zipper end pieces and sew along edge being sure to backstitch
Cut the ends even with zipper
*Note how I have the zipper partially open at all times. This is very important!
Place the zipper, pull side down, in the center of your gathered front piece.
Place the inside white piece over these, like a sandwich, and pin in place.
Switch your foot to the zipper foot.
Sew along the top edge as close to the zipper as possible, without sewing in the zipper teeth.
Don't worry if you get frustrated. I did, and still do, but it gets easier...
If you don't have a zipper foot, I recommend one, but it's not life or death. You can still work with a regular foot.
Press the front down and...
Sew the gathered front down along the zipper on the outside, shown above.
Do those same steps with the remaining flat front piece and inside flat piece. Same sandwich and stitching...
Now for the fun part!
Pin your front/back pieces together and your inside pieces together and stitch a 1/4" seam all the way around, leaving about 3" open in the inside pieces for turning the clutch right sides out.
Snip the corners.
Once you get your clutch turned right side out, iron out your inside pieces and stitch the bottom along the edge to close the opening.
Finish getting your clutch smoothed out and corners pointy...
For the zipper pull:
Cut a strip of fabric 1"x5"
Fold the long sides toward the middle and...
Sew close to the edge to close it up.
Angle the end
The angle helps to pull it through the zipper hole better. Make the pull even and then stitch right close to the red zipper pull so that the white fabric zipper pull does not move. Angle both ends evenly.
Like this.
Now you have completed your gathered clutch!
I hope you have enjoyed this tutorial and have fun making one for yourself or for someone special! Once you have done one, they are easy peasy!


