Pages

Tuesday, August 20, 2013

Tuesday Tutorial - English Muffin Pizzas!!

 If you want a quick and delicious meal for your family, this is it!  I remember the first time I had English Muffin pizzas:  I was in early elementary school and my family went to our friend's house for supper and she made these.  I thought they were the best things ever!  

Last night I made these up for my family.  I had English Muffins in the freezer that I pulled out in the morning to thaw for the evening meal.  Around 4:45pm I turned the oven on to 350.  I split the muffins in half, put a good spoonful of sauce on (I make my own pizza sauce; recipe below; but you can purchase yours if you want), a nice layer of cheddar cheese and a nice layer of mozzarella cheese, and then the pepperonis.  Aren't the mini pepperonis so cute???  I think so...
 Here is a before close up
 Pop them in the oven for 10-12 minutes, or until cheese is nicely melted.
Devour.  My family loves these!!  I know yours will, too.

Pizza Sauce Recipe:
1 can tomato sauce
1/2 can tomato paste
Italian seasoning (the amount you want)
dash of salt
stir to mix.
  Freeze the leftovers for a later meal.

Saturday, August 17, 2013

Chickens!!!

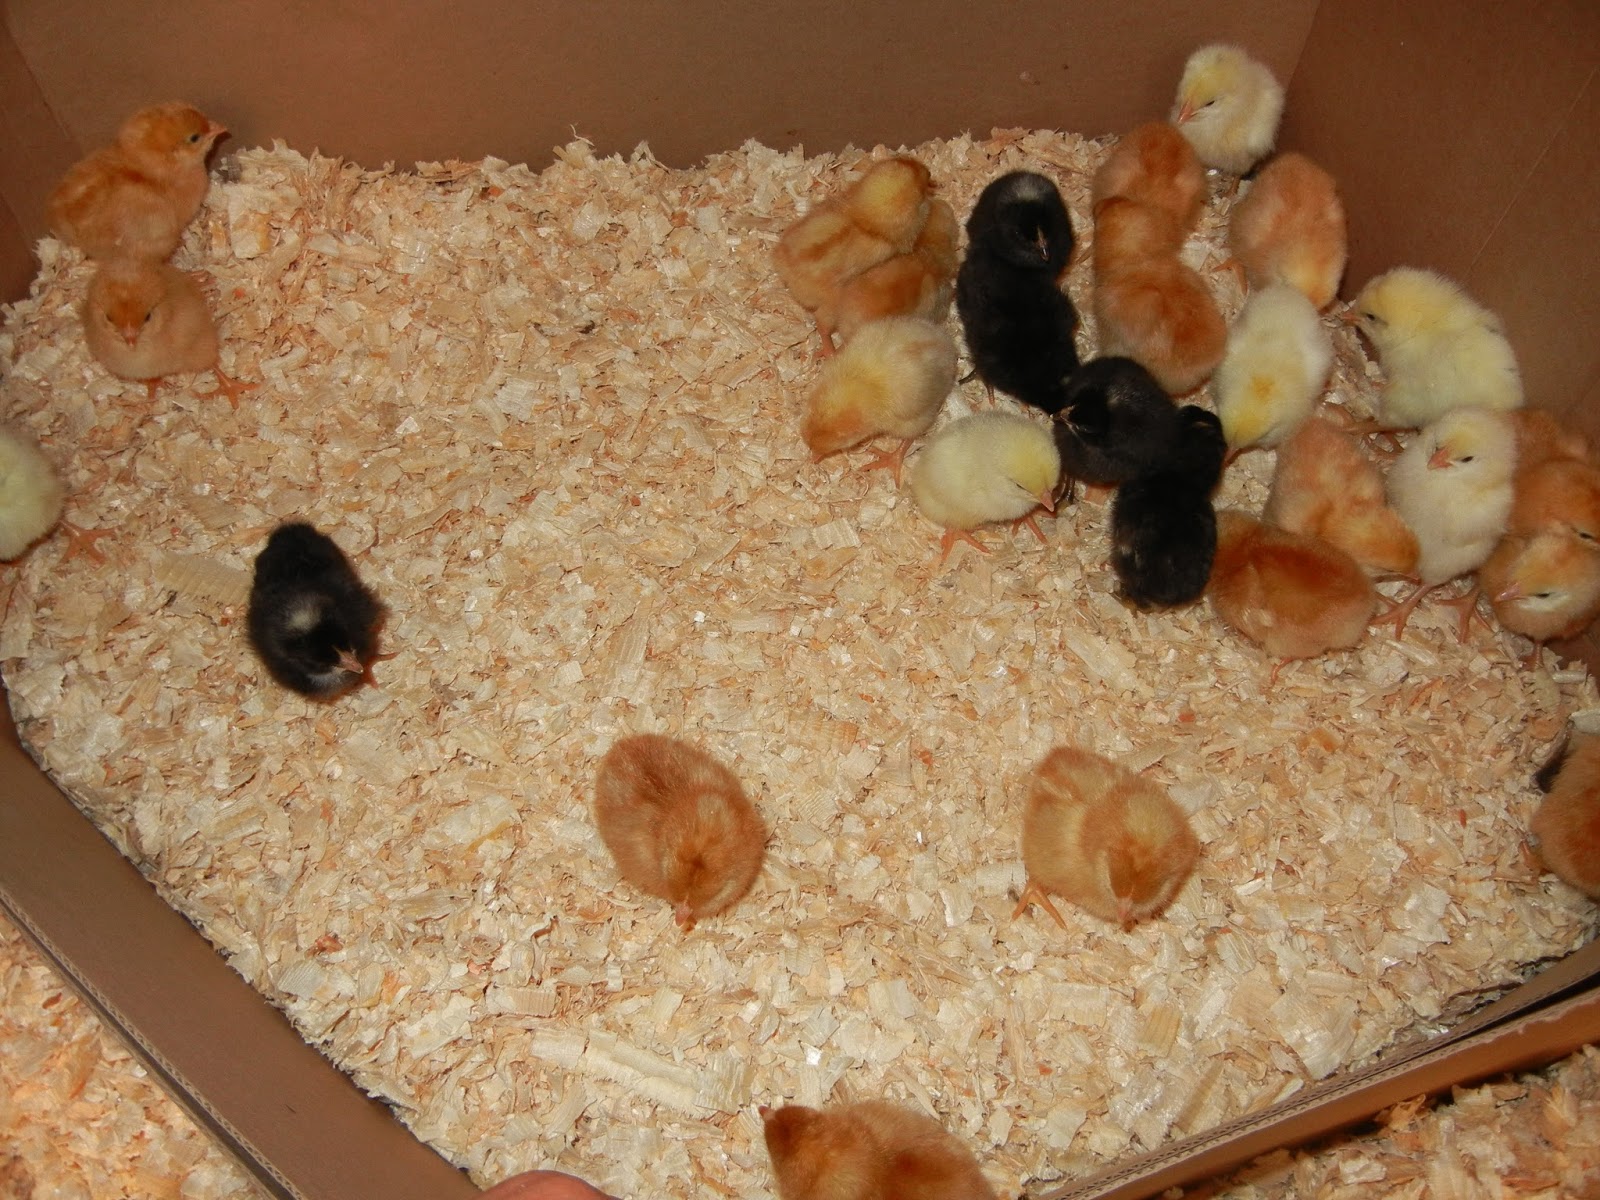
 We ordered pullets (all girls) shortly after moving to South Dakota.  I have dreamed of having chickens for quite some time.  All of us were so excited when we got the call that they had arrived (by mail!).  The kids and I went to town and picked them up.  All 27 of them were in this little box chirping away.  Too cute.
 Jason made this 'cage' for them.  Quite small to start with.
 So small they fit in our hands...
 We picked up a gallon water feeder and filled it up.  And a little grain feeder.
 Now look: our babies are growing up and we don't hold them anymore :)
These chickens are 'layers'.  Purely for laying eggs.  They'll start laying around January or so.  We are enjoying learning about chickens and I can't wait to go egg hunting!!

What about you?  Do you have chickens or any chicken stories to share?  I'd love to hear them...

Wednesday, August 14, 2013

Apple Pie - From Scratch

 As you know, we just moved here to SD the beginning of July.  We have heard from everyone: 'You should go to the the Turner County Fair', which is put on in Parker, SD (our town).  It's been a tradition since 1890.  So, we've been anticipating the 'Four Best Days of Summer'.  I read in our paper a few weeks ago that the fair was in need of 50 homemade pies for the Pie Tasting Contest.  I decided to enter an apple pie.  The tasting contest was yesterday.  I didn't place in it, but there was a hard competition with nearly 50 pies to compete against.  However, I do believe you'll find this apple pie recipe to be delicious!  I know it's a hit in our family and will be in yours as well.  

pictured above:  
3c. flour 
1/2tsp. salt
1/2tsp. baking powder, mixed with fork
 bring to a boil:
1/2c. water
add 1 cup oil
 pour into flour mixture
 mix until dough forms, split in half
 roll half of the dough into a circle between two sheets of wax paper.  This makes it not stick to the counter!
 spray your pie tin.  this is just a foil tin as it was for a contest and I wouldn't be getting it back, but you go ahead and grab your pretty pie plate...
 place your first crust into the pie plate.  you'll have dough hang over the circle.
 trim off the edges that are hanging over and throw those back into the other dough for the top crust.
set aside.
 For the filling:
I used 3 Granny Smith apples and 3 Gala apples. 
 Peel, core, and dice them up and toss into a big bowl.
 add about 1c. sugar
2Tbsp. flour
1tsp cinnamon
Stir to coat apples
 Nicely toss into the pie crust.  You'll need to help arrange them so they lay nice and won't poke holes in the top crust.
 'Dot' with 2Tbsp. butter
 Roll out your second crust, between the wax paper again, and place on top.  Fold edges to fit the pie and press gently to seal it with the bottom crust.
Doesn't it look good??
 Use your knife to make 4 cute slits in the top to let the steam out while baking.
 Sprinkle the top with sugar for a nice sparkly look.
 Now it's ready for the oven.
Bake at 350 for an hour, or until top is golden brown.
And...TaDa!  Your pie is baked and ready to eat with a bit of vanilla ice cream...

Pie Crust:
Mix:
3c. flour
1/2tsp. salt
1/2tsp. baking powder

Mix: 
1/2c. boiling water
1c. oil

Mix those all together.  Split dough in half and roll out between two wax pieces of paper.

Apple Pie Filling:
6 apples (3 Gala, 3 Granny Smith) peeled, cored, diced
about 1c. sugar
2Tbsp. flour
1tsp. cinnamon
2 Tbsp. butter

Bake in oven at 350 for an hour, or until top crust is golden brown.
ENJOY

Saturday, August 10, 2013

I'm Back...and re-located!

 I've been absent from blogging for quite some time, but with good reason:  We moved to South Dakota!  Jason grew up in western SD and we wanted to get back to a smaller town and in the country.  We found the perfect spot in eastern SD (Parker, to be more precise).  We live outside of town about 5 miles.  7 1/2 acres to enjoy and fill with animals.  This house was built in 1910, which is another dream of mine: live in a home with antique character!  The wood work is amazing!  Our home was moved to this spot in the early 1970's.  The owners have taken such great care of it.  Wood floors, crown molding, fir columns, just to name a few of our favorite features.  So, here is a peak at our home from the outside.  Don't worry:  inside pics are coming, too.  I am anxious to get painting done and continuing to make this house our 
Home Sweet Home
 The front porch is so fun!  It is a 3 season porch and I can't wait to get it fixed up just how I want it...
 This is our back land to the west.  Gorgeous to look at, especially at sunset...
 Side view of the house.  Don't you just love the pop of color with the red chairs?? I sure do!
And, to the west again at sunset.  I don't think I'll ever get over this beautiful view each night.  


Tuesday, May 14, 2013

Tuesday Tutorial - Play Dough Recipe

 Wow! It's been over a week since I've been on my blog to update and do a 'Tuesday Tutorial'!  Life gets busy sometimes, doesn't it?!  Today I wanted to share with you how to make homemade play dough... and after you make this you will never go back to buying it at the store.  This stuff lasts for years!  Seriously!

This is my big pan and I've added all the dry ingredients.
 Now add the wet ingredients.
 And your favorite food coloring.  This is red...to make pink...
 Turn on your burner to medium heat and start stirring it all together.  It will take a few minutes and your arm will grow stronger cuz this stuff gets a bit hard to stir.  But...don't give up...
 When the dough forms into a ball like this, take it out of the pan, turn the burner off, and set it on a spot that can handle the heat and let it cool for a few minutes.
Kneed it about 10 times into a ball.  Store in an air tight container.  I love this recipe!

Recipe:
2 cups flour
2 cups warm water
1 cup salt
2 Tbsp veg oil
1 Tbsp cream of tartar
food coloring

Add dry ingredients to pan
Add wet ingredients to dry ingredients
Add food coloring
Stir on medium heat until ball forms
Remove from heat and let cool on heat safe spot for a few minutes
Kneed dough 10 times
Store in air tight container

Saturday, May 4, 2013

May WINNER!!

The WINNER of this cute tote is Ashley!!  Congratulations and I know you'll enjoy this!

Thursday, May 2, 2013

Quilt!

I just finished up this quilt the other day and must say that I love it!  I love the colors, so vibrant, and I love the binding because I chose to do multi colors of fabric for the binding. 

What is your latest project??  I'd love to hear about it!