I like quick and fun projects. This Baby Blanket is super easy and really cute. I purchased two different coordinating flannels at 1 yard each.
Lay them out (after ironing out the wrinkles), right sides together, and trim up the sides to make the two pieces the same size. I took off maybe an inch of one side, so there shouldn't be much taken off.
Pin all the sides together, leaving about 6 inches on one end open. An easy way for me to remember to keep that 6 inches open is to face the stick pins another direction and start sewing on one end of the opening and ending on the other end of the opening. Easy peasy.
Here I am pinning the flannel together. I am sure you can see that my house is not in perfect order as I have three kids... :)
And, my sewing table. Remember to back stitch at the beginning and end of your seam. I use a 3/8" seam.
No idea why this picture is sideways. I tried to fix it and then gave up. Just turn your computer if you need a better view. he he he
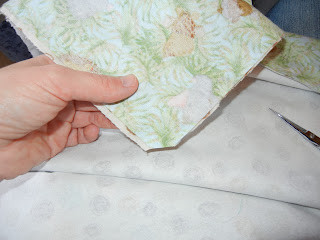
Snip the corners, but not the stitches. This makes the corners more pointy when turned right side out.
The corners snipped. Wonder who's behind the camera???
Jake is!!
He is my 6 year old son. Love that kid. He was super eager to be my photographer for these pictures. I'd say he did a great job!
After the corners are snipped, you need to utilize the 6" opening and turn the blanket right side out.
And iron it to make it nice and smooth.
Fold the opening ends under 3/8" (just like you sewed the rest of the edges). Pin it in place.
Now you can close the opening without anyone knowing there was an opening! Just sew close to the edge (see pic above) all the way around the blanket, being sure to back stitch at start/finish of seam.
Now you can decide how to 'quilt' the blanket. I chose to use my darning foot to quilt around some of the animals. Or, you can sew straight lines in the blanket. However you choose is fine. The purpose of this is to keep the blanket in place and stop it from shifting.
Now you have a cute baby blanket for a gift or for yourself! How fun and easy is that!! This blanket, along with a girly blanket I made, will go to the Children's Hospital here in the Denver Metro area. Some sweet baby in the NICU is going to be cuddled with this blanket and that makes me smile...


I LOVE the prints for your baby blanket and what a great idea - to bring them to the Childrens Hospital. Jake does a wonderful job of taking the pictures.
ReplyDeleteThis is a really cute blanket! And you make it look very easy. Jake is a great photographer! You should have him do this more often - I love tutorials of the people writing them:).
ReplyDelete